How To Carry DSLR Camera On Bike?
If you are a photography enthusiast and love to capture beautiful moments while cycling, then you must know how to carry DSLR camera on bike safely.
Taking care of your photography gadgets on the road will make sure you do not end up returning home with broken equipment.
Firstly, I will explain how to protect the camera, and then, I will dive into exploring the different ways to carry the camera to help you choose the method that suits your needs the best.
So, let us dive in and find out the perfect method by weighing the pros and cons and answering some FAQs.
Contents
DSLR Maintenance on the Road
Taking care of your gadgets on the road ensures you won’t return home with broken tidbits. It is best to take some extra measures to protect your camera from the possible damages it may incur during a ride on your bicycle.
- Take a microfiber cloth in your bag to clean the camera
- Keep a sensor cleaning kit and air blower dust
- Carry ziploc bags and silica gel packs to lock the moisture out
- Put your camera in a plastic bag to shield it from the rain
- A lens flipper device will help you change lens quickly in dusty conditions
That brings us to the central question of the article.
How To Carry DSLR Camera On Bike Safely?
There is no perfect answer to this, but we have found some helpful solutions. Keep on reading to find out.
- Trunk bag
- Small pouch
- Shoulder strap bags
- Handlebar or bottle bags
- Neck strap or sling
- Backpack mount
In A Small Pouch
This solution works best for smaller cameras. Not everyone wants to lug around a big DSLR on their journey, especially keeping in mind the weight and maintenance demands of such a gadget. If you can fit the camera into a small pouch, things get so much easier.
You can buy pouches that are mountable on the top tube – and they are generally cheap. These offer easy access for shoot and point cameras. Some digital camera pouches also come with a holding strap.
When carrying small camera accessories, storing them properly becomes a challenge. You can use multiple small pouches to arrange these small extras for easy find.
What do you look for in a small pouch? It has to be easy to remove and padded inside.
In Trunk Bag
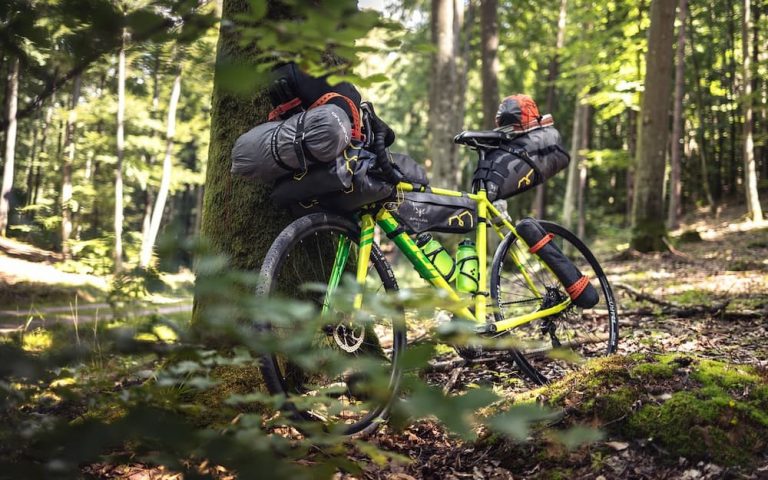
Trunk bags are effective storage compartments for any camera on a trip. Even if you encounter rain, it will keep the sensitive parts of the DSLR protected from the water. We suggest putting the camera inside a waterproof bag or wrapping it in a protective fabric. If you own a rear bike rack, it would be best if you can get a trunk bag featuring panniers.
Some other advantages of carrying a DSLR as well as your camera gear in a trunk bag include:
- Can strap a tripod if necessary
- Carries larger and heavier loads
- Reduces the pressure of the camera on the back
- Carrier slides on and off the bike rack effortlessly
- Good distribution of load when you are riding the bicycle
In Handlebar Bag
These are the kinds of bags that are mounted on the handlebars of the bicycle. Although a feasible solution to how to carry a camera, these come with their own set of cons. One of them would be how a handlebar bag interfered with the headlight shifters. Alternatively, it may not be the best shape for a particular setup.
In contrast, one major pro of using a handlebar bag is that it lets you store other camera accessories such as small camera attachments, backup batteries, and lenses.
Handlebar bars are super popular with cycling photographers due to their multi-purposing abilities. When you are leaving your DSLR at home, the handlebar bar can be a trusted storage for snacks, small foldable jackets, a mini-tripod, and much more.
In Bottle Bag
Bottle bags, as the name suggests, are made to mimic the shape of a water bottle. Naturally, they are good at storing food and water, but they can also come in handy when carrying a small digital camera.
A bottle bag can also be called a point n’ shooter bag. The best use for this particular bag is on the road. If you need to conduct a photo shoot on the go but cannot bother with large bags, why not give the bottle bag a whirl?
One disadvantage, however, of using this kind of bag is that carrying bigger lens attachments can be annoying. Cameras have a rectangular shape and tape up the majority of the room in this cylindrical unit, which brings us to another topic. Instead of carrying a big lens, consider bringing a pancake one. Those are easier to fit in these bags or even in a jersey pocket.
Bottle bags generally feature waterproof construction and a basic one-handed closure clasp.
In Shoulder Bag
Shoulder bags are convenient and easy to carry. You can swing one to the front of your camera, take your camera, and quickly snap a picture while on the move (but you should definitely stop the bike if you can to avoid getting into an accident).
One negative of having a shoulder bag is that it can be cumbersome after prolonged periods. Having a bag strapped to your shoulder can create pain across the body if it stays on for too long. Shoulder bags are generally carried like courier bags since they are strapped across the chest, over one shoulder.
You might have to move the bag around a little while cycling because they are loosely attached, but it’s still easy accessing the DSLR with just one hand. You can find your gear right away, given you had organized it properly.
The use of shoulder bags is noticing a rise in popularity as the cameras get smaller in size. This also calls for smaller shoulder bags. Many manufacturers have started paying close attention to the design and pattern to attract fashion-forward photographer cum cyclists. Some popular shoulder bags are made from upcycled materials such as inner tubes.
In A Camera Backpack
Camera backpacks are the most common answer you get from cyclists on how to carry DSLR on bicycle. These handy storages have multiple pockets, spacious inners, and are budget-friendly.
Some backpacks are equipped with mounts on the shoulder strap so you can carry an action camera. Having said that, carrying heavy equipment or a digital camera in a backpack on the cycling track has its own negatives.
The load is not distributed evenly on the bike and if you ever do end up crashing against something, you stand the chance of not only injuring your back but also damaging the contents of your backpack. A few important points to keep in mind when carrying your camera in a backpack”
- A light backpack is a way to go
- Use a piece of fabric to envelope the camera
On Neck Strap or Sling
Professional photographers tend to carry heavier cameras with tons of camera attachments to help them achieve the perfect shot. This is when a sling strap offers the adjustability and flexibility they need. But even if you are not a pro photographer, a neck strap or sling would be perfect for carrying extra large cameras that cannot fit in a bag or over the handlebars.
Many photographers say that a Peak Design Strap works wonders for them. It allows them to secure the camera tightly by cinching the strap. Another advantage of using a strap carrier is that you can loosen it, take pictures, and still have one hand steady on the handlebars.
In most of these cases, you get what you pay for. So, expect to make a sizable investment in a quality strap, so it doesn’t come loose when you expect it least.
Frequently Asked Questions
Can my camera be damaged by vibration when riding my bicycle?
Road vibrations are always a major concern when carrying a camera on the road; it’s not just about how to carry camera on a bike. Having the camera flush against the body while cycling lowers the vibration frequency on the camera, reducing the chances of damage. At the same time, you can damage the gadget with blunt force if you were to fall or crash against the ground,
Some cyclists find that carrying the camera in a trunk or handlebar bag protects their camera from vibrations. If you’re really concerned about the damages, best to have the camera mounted on your chest or simply use a cheaper camera that will not cause you too much pain if harmed.
How safe is it to take my camera with me on a bike ride?
Let’s be real – bringing your camera on your cycling journey will always pose some threats to it; you will always run the risk of damaging it. This is why many cyclists and photographers prefer leaving their cameras behind at a safe place after a certain point. No one wants to damage their super nice (and expensive) camera.
But that doesn’t mean you can’t have your camera with you when cycling. The best idea is to plan the ride ahead and adjust your storage and setup according to the conditions of the road. Remember: if you want to keep your pricey equipment safe, there will be some trade-offs. You may end up sacrificing comfort to ensure the safeguarding of your DSLR.
We suggest taking your riding technique into account. Avoid uneven roads as much as you can. Moreover, riding standing up when moving across rocky or bumpy terrains is helpful if your bicycle doesn’t have a suspension.
Can I take my camera tripod with me on my bike ride?
Tripods can be useful when you’re trying to take a photo of the perfect location or moment. Plus, it is the only way to get a decent shot in certain scenarios. This is why many people have asked me this question and I have written an article about the different ways to carry a tripod on a bicycle.
Which DSLR lenses to bring on my bicycle ride?
Every lens offers something unique – a different perspective. Before you embark on your next journey with your bike, it’s important to look into the many different lens choices. You may be tempted to bring all ten lenses for ten specific works, but you are limited by weight and space in a tour. So which ones make the cut?
You can never go wrong with a single one-do-it-all kind of lens on a trip. For a full frame camera, get something like a 24-105mm F4 – it offers a diverse range of telephoto and wide. We adore the 18-135mm zooms for crop sensor cameras. Apart from being diverse, these lenses work well in most conditions. If you must carry multiple lenses, an ultra-wide lens will be a good choice, like 10-22mm/10-18mm (crop sensor body) or a 16-35mm F4 (full frame).
In comparison to F2.8 lenses, F4 lenses make much more sense because they are smaller and lighter. Plus, as you will be traveling the most in broad daylight, an F4 lens will provide better chances. Most of your landscape captures will be taken at F4 and F8-F11 lenses.
Either way, it’s best to stick to one or two lenses for the journey. Every time you switch them, there is a high risk of debris accumulating on the sensor.
Conclusion
As a cycling enthusiast who loves photography, I’ve always been keen on finding safe and efficient ways to carry my DSLR camera while riding.
This article has explored various practical solutions, highlighting the importance of both protecting your camera and choosing a carrying method that suits your needs and style of cycling.
Maintaining your DSLR on the road is crucial. Pack a microfiber cloth, sensor cleaning kit, and silica gel packs to ward off moisture. Depending on your camera size and personal preference, options like small pouches, trunk bags, handlebar bags, bottle bags, shoulder bags, and camera backpacks offer a range of benefits.
For smaller cameras, small pouches are a breeze, offering easy access and minimal fuss. If you’re carrying more gear, trunk bags are great for larger loads, including a tripod, and have the advantage of being weatherproof. Handlebar and bottle bags are fantastic for quick access, though they have limitations in size and shape. Shoulder bags, growing in popularity, offer easy access and are ideal for smaller cameras. And, of course, camera backpacks remain a staple for their versatility and spaciousness, though they can be a bit cumbersome for longer rides.
In my experience, the best method depends on the trip’s length, the camera size, and personal comfort. No matter the choice, ensuring your DSLR’s safety and accessibility is paramount. Cycling with a DSLR doesn’t have to be a challenge; it’s an opportunity to capture the world from the unique perspective of a bike saddle.

